
Wrench Set

ALL paper is from The Paper Company's Value packs.
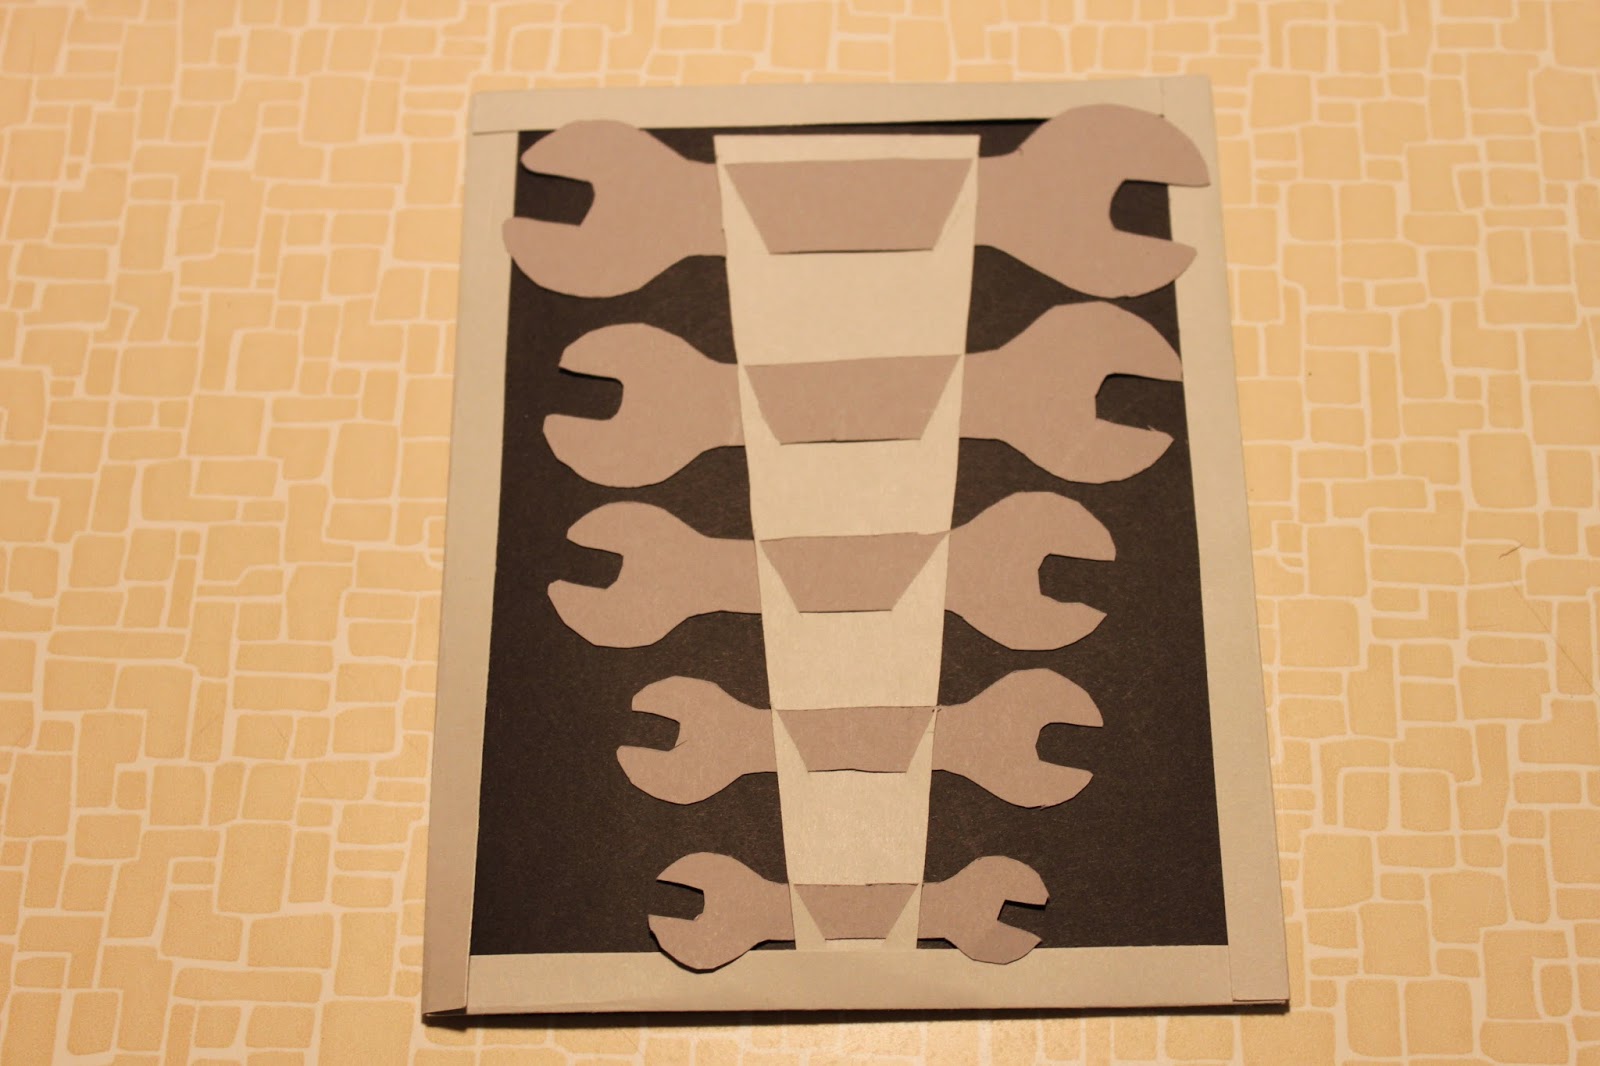

I was very proud of myself when I cam up with this idea.  I cut 5 wrenches all at different sizes out of a gray cardstock.  I lined them up the way I wanted them and measured how big I needed the holder and then cut it out of a slightly different shade of gray.  I made little slits on the sides so that the wrenches could slide into to be held.  I attached the wrench holder, using my ATG gun, on to a black piece of cardstock that is folded in half and put a 1/4" border around the outside in the lighter gray.


I decided to leave the wrenches removable so that you can add journaling on the back side of them.


When you open it up there is a spot for a photo or journaling on the back of the cover.  I also added a pocket with a photo-mat inside, and there is room for another photo or journaling on the pocket.


This project is great for your bigger pictures that you can't or don't want to cut down.

Happy Crafting!!!!

Comments

Popular posts from this blog

Frisky Melon!!

 I made this card for the Fantabulous Cricut Challenge Blog's Challenge Me Monday Contest!!  Yay!!  I started with a piece of pink cardstock cut at 5 1/2"x 8 1/2" and folded it in half for the base of my card.  This was from one of The Paper Company's value packs.  Then I cut a piece of black cardstock, also from The Paper Company, at 5 1/4"x 4" and used it as my first layer.  I attached this using my ATG gun. For my second layer I cut a piece of paper from the Colorbok Pattern Pack at 5"x 3 3/4".  I then wrapped a piece of grosgrain ribbon around it and secured it in the back using regular tape.  Then I attached the whole thing using my ATG gun.   I cut the watermelon at 4" using the "Stretch Your Imagination" cartridge with my Cricut Expression.  I used a black, pink and green paper, all were from The Paper Company value packs.  I attached it to the card using 3D-Dots. Then to finish off this card I added a My P...

Project 7

My hubby has his own "crafting" that he does, he tears apart and rebuilds cars.  He bought a Mazda RX7 when we first arrived in Germany and he is turning it into his own little race car.  The only way I can understand it is to compare it to my crafting and he gets just as excited over car parts as I do over crafting supplies, so it must be a really awesome thing to him LOL!!!!So I wanted to make him something to recognize his project.   I took that canvas that I messed up the first canvas transfer on and I gessoed it until you could no longer see the attempt at the image transfer. First I used my Faber Castell Gelatos, metalic gold, squid ink, and silver and I randomly added them to the canvas and blended them in using my finger.  I also used my black gelato to distress the edges of the canvas and blended it with my finger.  Then I used a gears 6x6 mask from Crafters' Workshop and covered it with modeling paste and let it dry.  Once it was dry I us...

Anything Goes Challenge Blog #58

 I'm posting this all in one blog post because I'm entering it in Anything Goes Challenge Blog's Challenge #58 .   I felt the whole project was too big for one post so I've been working on posting each mini album and the toolbox in their own posts.  Today I finished up posting the mini albums on my blog, so here I posed a couple pics with a link to the individual posts. This was a craft project that I made for my husband the Vehicle Mechanic, in and out of the USAF, for Christmas.  To see my post on the tool box click here: Tool Box  To see my post on the socket set click here:  Socket Set  To see my post on the drill click here:  Drill To see my post on the wrench set click here:  Wrench Set  To see my post on the saw please click here:  Saw To see my post on the gears please click here:  Gears Happy Crafting!!!!